So i was waiting until i turned in my project before giving this away. but if anyone wants to know how i did my project
So what you need to do is open your photo in photoshop if you photo is a smart object you need to rasterize it then inverse the picture by pressing control or command depending on your computer then convert the picture back to a smart object. Then go to your blending modes and click on liner dodge (add) your canvas will go blank (dont panic) go up to filter and go to blur and then Gaussian blur and decide how much of this effect you want or dont want. You can also turn this black and white if you click on the adjustment layer to do so. and you are done.
Wednesday, December 9, 2009
Tuesday, December 8, 2009
computer woos
My computer is having a melt down i am going to need to get my computer into the shop really soon i have had a really hard time trying to finish this project as well as the project for my experimental class because my computer has been having a mental break down for about a month now. it has been challenging i will be excited when i get it fixed.
Printing
Its been a challenge to get everything done this week but i have managed to get what i hope is everything done. I have been getting my prints done at Costco and i have had a great experience this time around i am happy with my prints and am happy with my project.
Wednesday, December 2, 2009
in progress


I have some hard copies to show in class or at least to kyle tomorrow but from your suggestions this is what i have been working on. any thoughts or suggestions?
Sunday, November 29, 2009


Change


So i feel that my project is taking a different road. Its becoming more about lights. Also i am liking the effects i am getting in photoshop i worry that it is just to much alike. Any thoughts or fed back would be great. I think i will present more in class
digital infrared
So first step is to open the photo that you want to use then you open the channel mixer in the adjustment layer and choose the black and white infrared RGB. Once you are in the mixer you can make further modification to the photo if you are trying to bring out the greens you can pull up the greens in the photo by using the sliders. If this is not bring out the results you are looking for you can convert the image into black and white with the black and white layer mask then from the pull down menu choose infrared. If you want to control the opacity of the infrared you can by sliding the opacity down on this layer. this will bring up the color in the photo if you dont want the color to be there then open the hue/saturation layer and bring down the saturation all the way then you can bring down the opacity on this layer and not have the color show through.
solarization
if you are looking for the solarization effect in your digital photos here is how you do it.
Open your picture in Photoshop and convert it into black and white from the adjustment layer options. Once you have this you can adjust to what you want to be illuminated by clicking and sliding your mouse back and fourth. then you open up the curves adjustment layer. Then click on the icon in curves that looks like a pencil its called draw to modify the curve. when you click on that then you click in the graph on the bottom left then shift click in the top middle and then shift click again on the bottom right hand side. this will give you the solarization effect. If you want to add a little color back into you photo open another curves level and you can add what you want.
Open your picture in Photoshop and convert it into black and white from the adjustment layer options. Once you have this you can adjust to what you want to be illuminated by clicking and sliding your mouse back and fourth. then you open up the curves adjustment layer. Then click on the icon in curves that looks like a pencil its called draw to modify the curve. when you click on that then you click in the graph on the bottom left then shift click in the top middle and then shift click again on the bottom right hand side. this will give you the solarization effect. If you want to add a little color back into you photo open another curves level and you can add what you want.
Tuesday, November 24, 2009
day of shooting
So it took a little bit to get started today but i think i got some pretty good stuff. I am not sure what i am going to do with all of the pictures i will post some once i have gone through all the pictures.
Monday, November 23, 2009
more to come
I will not be in class tomorrow because i am going to be out an about shooting for this assignments. but i will be posting pictures of what i have worked on.
Thursday, November 19, 2009
research


While i was working on a research paper i came across a name of a photographer who does a lot of different things, working from black and white photos, digital photos, color C-prints, video, and silkscreen. She does mostly video installation.
So i forgot to tell you guys the name i was to distracted by adding the pictures her name is Fiona Tan
Backlit subject
If you have a photo that has a lot of light in the background that is blowing out the subject in the foreground you can go up to image > adjustments > highlight and shadow once that opens you can see already the image is better. You can then go and adjust within the photo and it will help you to quickly correct your image. You still might need to make more corrections but this will help to give you a head start.


Wednesday, November 18, 2009


shooting


So i dragged Laura with me back into the Hollywood hills. I have taken some pictures that i will use and others i will not use because i need to reshoot them. They are blury from me hitting the shutter. Thank you to laura for teaching me how to use the timer on the camera and letting me borrow your lens that makes my project that much better. I am thinking that i will be showing some of the pictures in class tomorrow to get some feed back. There are plenty more to come but here are two pictures i will be going from.
Thursday, November 12, 2009
Rotation of photo
To rotate a picture thats been scanned crooked go to the tool bar select the eyedropper and hold down and select from there the ruler you will then draw a line across the edge of the picture. Then go to the image menu and then go to image rotate then choose arbitrary which will measure how far off the image is and hit ok it will correct the image.
so much information
So much information so little time
So i was going through more videos and found out some short cuts that might really be helpful
The left [ key will make the brush size smaller.
The right ] key will make the brush size bigger.
You can also on a mac hold down control + option then with the mouse click and drag left to right and make the brush bigger or smaller.
command + option + o will allow you to switch between bridge and photoshop
V= move tool
F= screen modes
F goes forward and shift F goes backwards
You cn change a horizantal guidline from the top ruler to vertical by holding down the option key
Command + R = Ruler
Command + ; = guide lines
Command + ' = grid
H = hand tool
Command + = zoom in
Command - = zoom out
Command 0 = fit to screen
R = Rotate tool
Tab = clean screen
I = eye dropper
just found out
I posted a link to http://photoshopnews.com/ and i realize now that i have had a quick chance to look at the site it has movie tutorials. So if you can get onto Lynda.com maybe you can find something there. It also has information of syncing up the computer monitor to the printer.
There is no reason to be afaid of Channels
So i have just learned about the channels menu in photoshop. I have seen the channels menu before but had no idea what it was used for. It is to see detail and be able to bring it out within the original document. So i dont really have a photo to show an example of what the changes are but i hope by the explanation you will understand. If you have any questions i can try to clarify.
If you have a picture and you know there is detail in part of the image but because it was taken by a digital camera which blended the texture to be smooth you can look at the Channels Menu. In the menu you can check out each channel the Red, Green, and Blue. In one of these channels you will see that the detail that you are looking for has come through. So say that you have an area of red that you know there is detail but when you get it into photoshop you realize you dont see any of the detail. While you are going through the channels menu you will see that the green channel has so much detail, if you move onto the blue you will see there is not much detail, that will not help you. (when you are going through the channels menu you will see that the places within the picture are highlighted are the areas that are represented by the color. Also about 90% of the time you will not need to use the blue channel. However do not dismiss this channel because it may come in handy.) So once you have figured out what channel you need you can go back into the Layers menu you can convert channels into a layer using the Channel mixer adjustment layer. So open your adjustments menu which is under window and make sure that it is open.
And click on the channel mixer adjustments. This will bring up a menu as well as creating a new layer. Make sure to click on the monochrome box which will make the image turn black and white. If you zero out the other colors that you dont need and bump up the layer to 100% that you need. So if you dont need red or blue then make sure that the number that is sitting next to them is zero. Because you need the green layer make sure you bump that up to 100%. This will bring the green so that you can correct the lack of detail. Once you have done this you can go up to the blending modes and choose pin light. Then when you get finished with all that if you feel like the color is to much use the opacity slider on the adjustment layer to bring down the color a little to blend the layers a little better.
Monday, November 9, 2009
adendium part 2
I have been going through Lynda.com and i have discovered some very interesting techniques i am thinking i will be able to integrate
them into my project somehow.
them into my project somehow.
adendium
maybe i can supper impose two picture together and make them look like they are real places but having something be off about them
Its been a while
Ok so I have been trying to come up with something else to work on. By the end of the last project i felt that i was done. Even though i came up several more ideas at the end of the project of course to late to do anything with them i feel that i have exhausted all of what i wanted to do with that assignment. The project was not coming out the way i wanted it to and i feel that i need to stop.
So i have been racking my brain about what do for the next step. I started thinking about the fact that i have been living in Los Angeles for about 3 years now and i have yet to explore the city that i have called home. So i was thinking about doing a piece of exploring LA do the tourist thing by going to hollywood and taking pictures of the walk of fame, so on and so forth. I am not sure how though to manipulate these pictures after i take them in Photoshop except for just color correcting them. I will continue to think about what to do and how to manipulate the pictures.
So i have been racking my brain about what do for the next step. I started thinking about the fact that i have been living in Los Angeles for about 3 years now and i have yet to explore the city that i have called home. So i was thinking about doing a piece of exploring LA do the tourist thing by going to hollywood and taking pictures of the walk of fame, so on and so forth. I am not sure how though to manipulate these pictures after i take them in Photoshop except for just color correcting them. I will continue to think about what to do and how to manipulate the pictures.
Tuesday, October 27, 2009
Reflection of project One
I am DONE...(i think) I hope. Well i have had a few printer problems with color. I have tried to color correct for that but when correcting for one color it brings out another problem in the color. I know its not surprising. But i dont know. We will see how it goes. Of course by the end of this project i have started to get a bunch of ideas, through the whole process i have been beating my head against a wall trying to come up with different ideas what to photograph when to photograph, should i use the pictures i already have so many thoughts make it a color study, a noise study a texture study. i dont know i have had a lot of thoughts in the past couple days but it seems pointless to change the project so close to the due date. So i have left them i have added a few things and taken a few things away. Its a Moments in time with a little texture. I have learned a lot about frustration through this process and i have learned about how hard it is to motivate yourself to work on a project without a teacher breathing down your neck to finish. I only wish i had a larger body of work to be working on to build my portfolio versus only working on a project to full fill my assignment. I have done a few different treatments to what i am turning in but i do wish i had more ideas to push it further. I started to look at a few different artist which helped to give me the ideas. The artist names are on my blog. Anyways i may have more reflections later but for now thats all i have.
Monday, October 26, 2009
Getting everything together
I am trying to get everything together to present tomorrow, however i dont know if i have enough things to turn in still confused about what the concept is. It has gone from moments in time to more of a textural theme on top of the moments in time. I dont know.
Sunday, October 25, 2009


notes
Vic Muniz
akatre
andy Hixon
Jan Smaga
Kim Joon
Nick Cave
Nicole tran bavang
curves
-info
-shift click with the dropper to get the highlight midtones and shadows
10-20
Printing
prints darker
hard to adjust color
How much
limited # test
Shadows Midtones and Highlights adjustments
Money
adjustments for printing is called targeting. Nothing is said about our out put device. we target for the output device. Do another curves specifically for printing. Do test prints...
Raw Converters RPP
When working in Raw make the mega pixels larger here not in Photoshop. under work flow options. Never sharpen in RAW . only at the end in photoshop way for everything to be set.
Unsharp Mask
adding contrast at a very fine level. Radius between .4 and 1.4
Smart Sharpen
Soft proofing
Changes
So I am thinking that instead of having three pictures i feel that having two pictures will be better suited for my project. We will see.
Thursday, October 22, 2009
day off
So it doesnt look like i am going to get around to getting any work done in this class today i have to go back to school after six so i can get some parking. I Have an assignment that is due on Saturday Morning sooo thats what is coming first then.. i will do work on digital and experimental.
thats it for now.
thats it for now.
Sunday, October 18, 2009
blur
I am thinking that maybe i can do a project about a weekend blur. What i do in a weekend... Any thoughts
confused
If anyone can help me, or at least help explain this to me. We are supposed to be taking pictures and then digitally enhancing them not really sure what we are supposed to be doing in photoshop. does it count to just take the picture put it into photoshop and then print it?

Change
So as remedial as this sounds i feel like this assignment is now becoming more about texture so i am thinking that its going to continue on as texture instead of being moments in time where put together pictures i already have i need to take some more pictures of different things that will when combined become textures.
Saturday, October 17, 2009
work
To be posted. I need to make my file much smaller before i post it. However i applied the techniques we learned on tuesday to my work and i am thinking that it is working much better i am not as frustrated. However i still have some tweaking to do so i will post in a little bit.
Wednesday, October 14, 2009
Music


I have been introduced into the local music scene in the bay area. Some i have also become friends with several bands. I did find out on friday night that one of my favorite bands broke up but the guitar player has started to lay with another band that i was able to see when i got into town. YAAY They are called Bang Data and they are a little latin little rock and a little rap
Weddings


I went home over the weekend and worked on a wedding. It was a lot of fun. My only regret was that i was unable to stay for the reception. The hall that the reception was held in was beautiful. There was sort of a Fairy theme to the wedding so she had trees imported into the hall as well as some other exotic and very beautiful flowers. This wedding cost easily a million dollars.
My first love


My first love will always be San Francisco. I was born in this city and raised in this city. It never ceases to amaze me on what you will find or see while even in there for a day. I saw people dancing to what i can only imagine to be techno music with glow sticks in their mouths while i was sitting in my friends car looking into a window of an apartment near the Golden Gate Bridge.
Wednesday, October 7, 2009
Brian Bress

So i watched the artist lecture tonight and am impressed as to how far he pushed himself to open up and let the world see him in such a way. I dont think that i would ever be able to do a performance. Even if it was in front of a camera. I would not be able to get over the fact that there is a camera and i will then show these videos to people even if it was just for me i dont think i could do it. He does have a lot of interesting things to do he is able to answer all of the questions that people were asking him and thoroughly. It also very interesting that he doesnt plan any of his work he just makes it up on the spot.
Monday, October 5, 2009
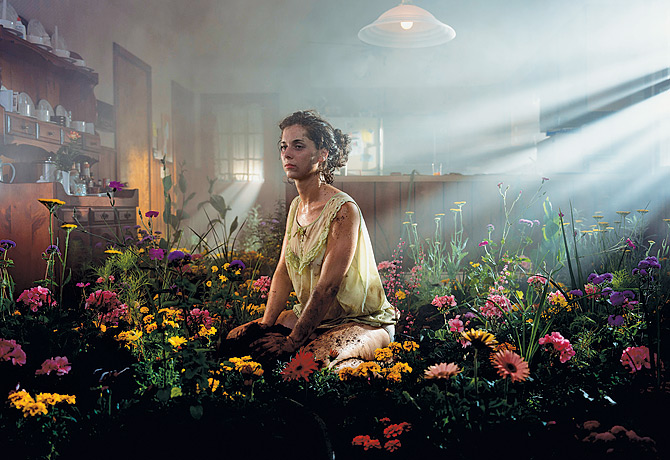
gregory crewdson
http://www.youtube.com/watch?v=RywAfP4KFcY
This is a little tid bit about gregory crewdson
This is a little tid bit about gregory crewdson


Sunday, October 4, 2009
Just Sitting here
I am at school firing a Kiln bored. Working on my assignment trying to get something to happen that is interesting to me. I am not sure i am going to continue with this project because although i am attached to these photos i am not sure i am really attached to this project. I will post the progression after i am done working on it today.
Friday, October 2, 2009
art gallery
I went to a friends gallery opening in Santa Monica on Thursday night. It was awesome. I was able to talk to the artist and she was able to shed some light on the subject matter. She is a photographer but also works at the Getty. In the show she has an intire wall devoted to her work. Its all photo-grams- she was able to explain to me how she was able to develop the ideas and photos that are amazing. anyways that is my thoughts for the moment.
Wednesday, September 30, 2009
Moments in time

So i have started to work on project #1 Moments in time... any thoughts criticism or help?? I am thinking the opacity is to high on each layer?
Subscribe to:
Comments (Atom)

